Hello there — picture this: You’ve just moved into your new home. The sunset is painting your patio gold. You’re imagining friends gathered, laughter, maybe even barefoot steps on a smooth stone surface. The idea of a gorgeous travertine patio excites you, but then comes the worry: Will it still look good in five years?
This post will walk through how professional installers make sure your patio, pathway, or pool deck holds up beautifully over time. If you’re researching travertine installation services in Arizona, this is for you.
By the end, you’ll know the steps they take, what signs to look for, and how to get results you’ll still love years later.
Why Travertine Needs Expert Handling?
Travertine looks elegant now, but through years of sun, rain, footfalls, maybe children playing, and maybe pets wandering, natural stones can crack, stain, or even shift, not to mention losing their shine with poor installation techniques. Professionals aren’t just after beauty either. They plan for durability.
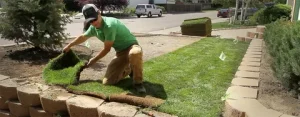
Step One: Laying a Solid Foundation
Your travertine is only as strong as what’s beneath it. Pros start by digging out and leveling the site. They’ll compact the soil, add a gravel or crushed stone base, ensuring water drains away.
Skipping this means water pooling or shifting ground. Tiles may loosen or crack. A long-lasting finish starts with a stable base.
Step 2: Dry Layouts & Smart Tile Placement
Before any cement or adhesive touches stone, the installer lays out tiles dry — no mortar. They arrange the pattern, mix tiles from different batches to even out color variations, check spacing, and borders.
This trial run avoids awkward cuts, uneven edges, and surprise gaps that could weaken joints or look untidy later. When you see a design flow naturally… the finished result feels intentional and lasts longer.
Step 3: Precision Cutting & Leveling
Each tile must fit. Pros use wet saws or diamond blades so cuts are clean, edges are smooth. They raise or lower tiles with thin-set or mortar to make every stone level with its neighbor.
Uneven tiles create stress points. Underfoot, those spots become weak. Over time, you feel it — cracks or loose edges. Professionals avoid that by checking levels constantly, tapping tiles into place, and making sure everything is flush.
Step 4: Proper Adhesive, Mortar & Grout Strategy
The right adhesive matters. Weather and temperature changes mean materials expand and contract. Pros choose flexible adhesives or mortars that can absorb those changes without cracking.
Grout or joint filler between stones is also picked carefully. If grout cracks or washes out during storms, water seeps beneath stones. That weakens the whole structure. Pros fill joints properly, maintain consistent width, and use grout that resists moisture and movement.
Step 5: Sealing & Protective Measures
Travertine is porous. Without sealing, it can absorb water, oil, or even rust stains. A good installer waits until everything is dry, then applies a quality sealer.
Also, they tell you how often to reseal — usually every 1‑3 years depending on exposure. Sun, water, and foot traffic all play roles.
What are the Maintenance Instructions You Should Follow?
After work is done, pros don’t leave you guessing. Expect simple, clear guidance:
- Clean with mild, stone‑safe cleansers
- Sweep regularly to prevent scratches
- Reseal when the sealant starts to wear
You know, they may also suggest pairing regular stone maintenance with nearby Paver Design Services in Phoenix for a seamless look between travertine and other surfaces.
Extras that Show the Difference
Some installers take that extra mile:
- Edge restraints: borders that prevent stones from shifting sideways.
- Expansion joints: small gaps around structures so the stone can expand under heat.
- Proper drainage slope: so water doesn’t pool or run underneath stones.
Those details aren’t flashy — you don’t always notice them at first. But when years pass, they’re what save the patio from damage.
Why the Finish Matters More Than You Think?
A poor installation doesn’t always show up right away. Sometimes it’s a few months later — a tile lifts, edges chip, or the color fades. And just like that, the investment feels wasted.
But a well-installed travertine space becomes more beautiful over time. The stone settles naturally, the seal protects the finish, and every detail holds strong — even in Arizona’s heat.
If you want travertine that looks as good in five years as it does today, then professional installation isn’t optional — it’s essential.
The Last Word: Your Best Decision with CGL Landscaping
Choosing travertine installation services in Arizona is more than picking stone. It’s choosing someone who builds for years, not just for today. When everything is done with care and professionalism, what you get is more than a patio — it’s peace of mind.
Look for installers who prep their bases meticulously, cut and level precisely, use the right materials, seal properly, and guide you on care. These are the people who’ll give you a travertine finish that holds beauty and strength.
Because when it’s done right, your travertine surface becomes more than just a feature — it becomes a lasting part of your home. For expert results you can trust, reach out to CGL Landscaping — where every finish is built to last.